
How To Make a Basic Hair Bow
Now YOU can learn how to make grosgrain hair bows and handmade polka dot grosgrain cheer bows for your little princess or to sell on Ebay or craft fairs!!!
Introduction
Hello to all. I know there a lot of different ways to make ribbon for hair bows but I made these
particular instructions based on a technique that is easiest for me.
I hope you find these instructions useful.
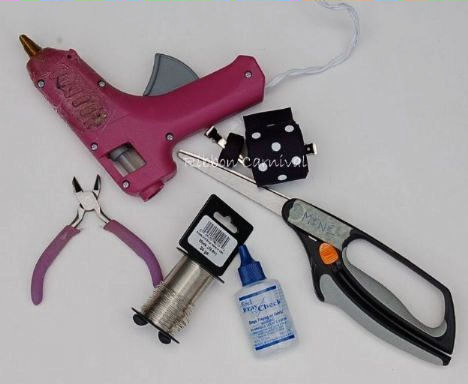
Supply list
Ribbon examples
“35 for a 1.5” inch width size bow
“21 for a 7/8” inch width size bow
“12 for a 3/8” inch width size bow
Scissors
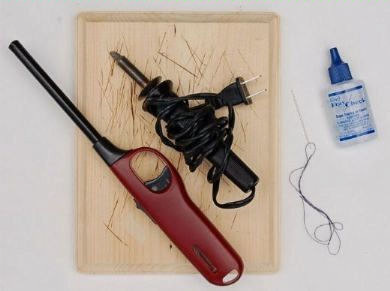
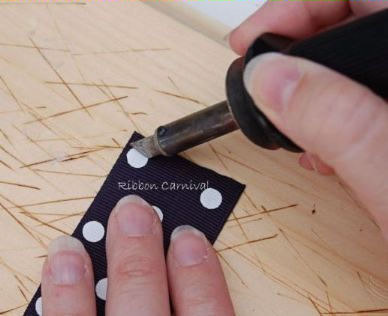
Fray Check, a lighter or a wood-burning tool
24 gauge wire or needle with thread
Wire cutters
Glue gun
Preparing Your Ribbon
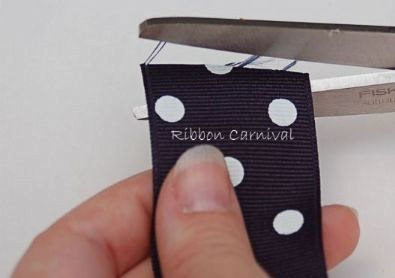
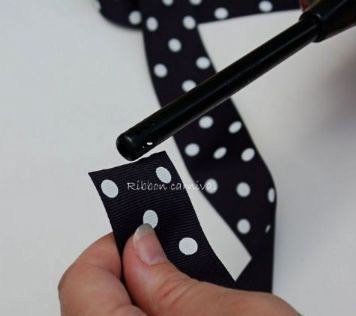
Take the end of your piece of ribbon and cut it. You can seal the end of your ribbon by using Fray Check, a lighter or a woodburning tool.
Sealing Tools Options
Looping Your Bow
You may want to pin the loops at each stage if it helps.
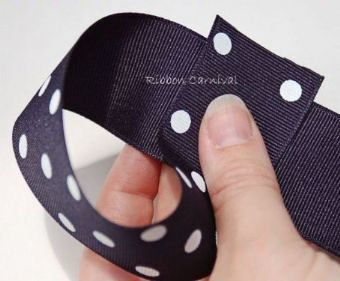
Hold ribbon with the backside of the print facing up. Take your right hand, which is
holding the end piece of the ribbon, and loop it to the left and coming back around over
the backside of the ribbon. Hold that loop with your left hand.
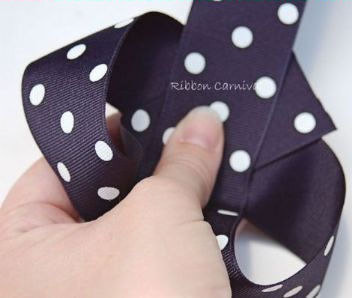
Take your right hand and hold the other piece of the backside of the ribbon. This
time you will loop your ribbon around towards the right and back over the
backside of the ribbon. Make sure your two loops are even by pulling the excess
ribbon down. Hold those two loops with your left hand.
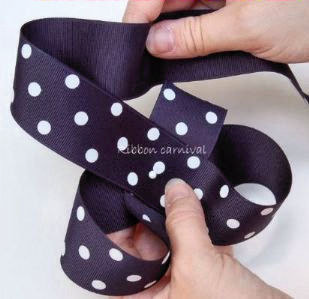
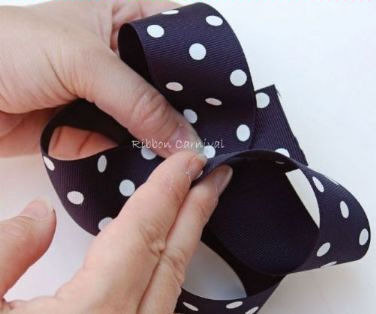
Take your right hand with the printed ribbon right side up and loop it going
towards the right of the bottom of your bow. Slide that loops underneath the
piece of ribbon that you began the bow with. Hold the bow with your left hand.
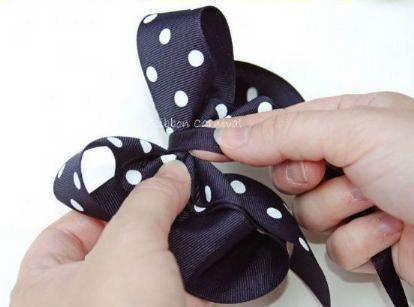
Make sure your bow is showing where the top of the bow is right side up. Take
your right hand and loop the last part of the ribbon towards the left and down the
middle of your bow. Hold your bow with your left hand.

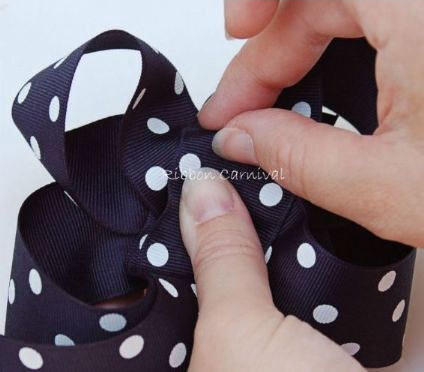
Make sure your hand is holding the bow where your left thumb is in the middle of
the bow. Now you’re going to fold the center of the bow like an accordion with
your right hand. If you have a large bow I would suggest you fold it 3 times, a
medium size bow 2 times and a small bow 1 time. Hold the folds with your left
hand.
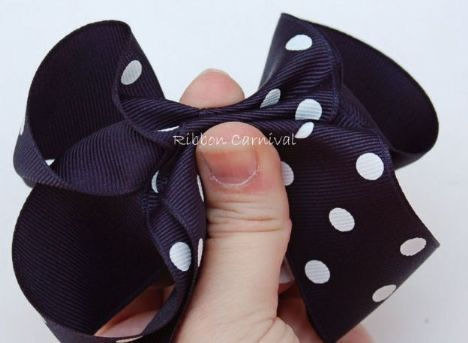
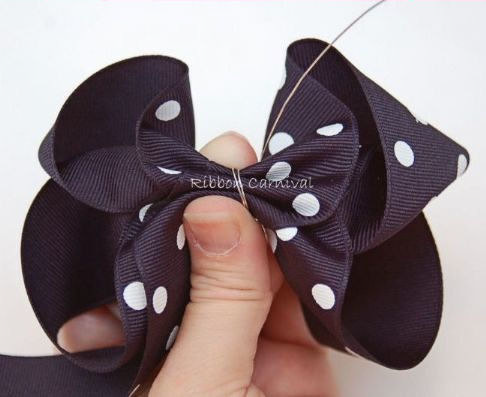
Take your wire with your right hand and wrap it around your folds once or twice
and then pull the wire tight. You can kind of shape your bow at this point to make
sure all your loops are even.
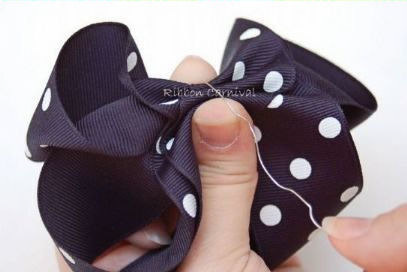
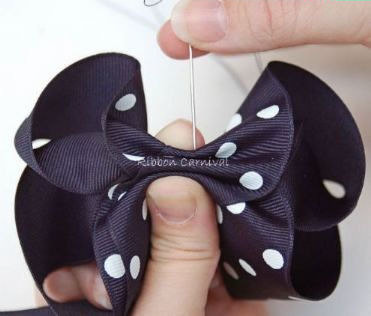
You can also you a needle and thread and go down towards the bottom fold and
then wrap it around twice and tie.
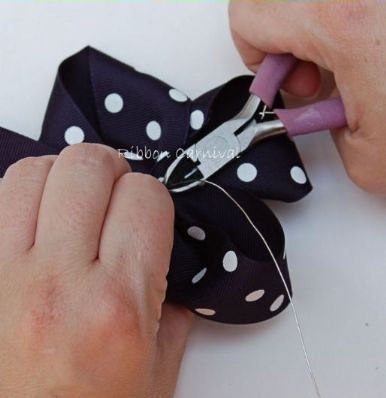
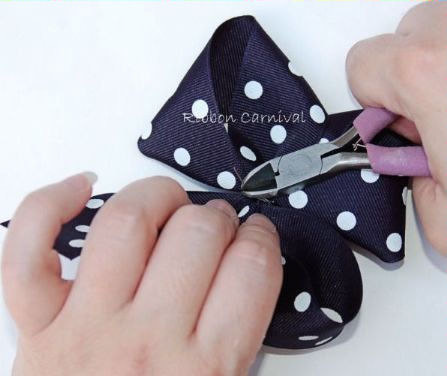
Turn your bow over and cut excess wire.
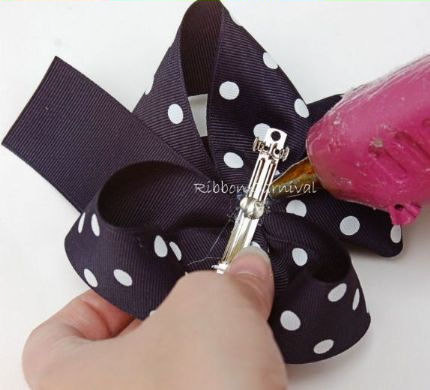
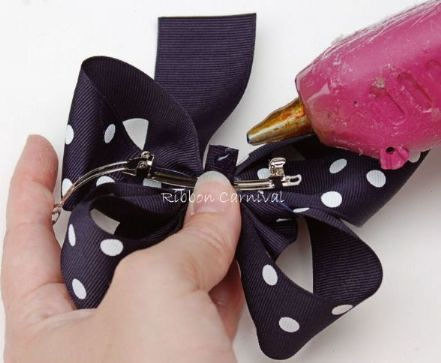
Mounting your bow on a French clip
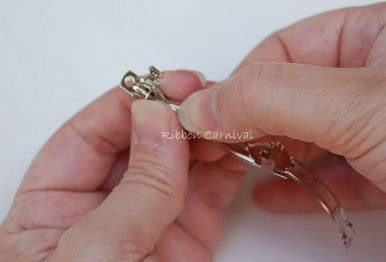
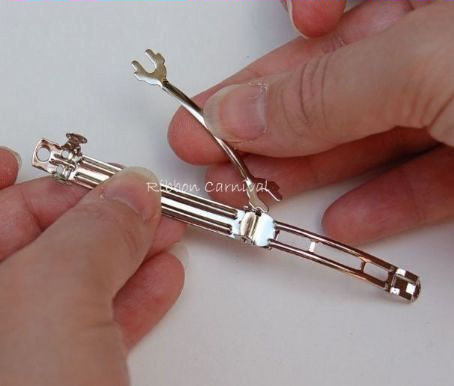
Turn over your French barrette clip and remove the spring.
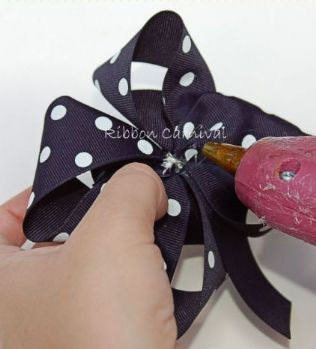
Glue the back of your bow and place it on top of your clip. Make sure you press
your bow firmly on the clip to secure it.
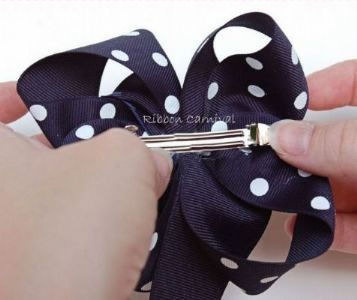
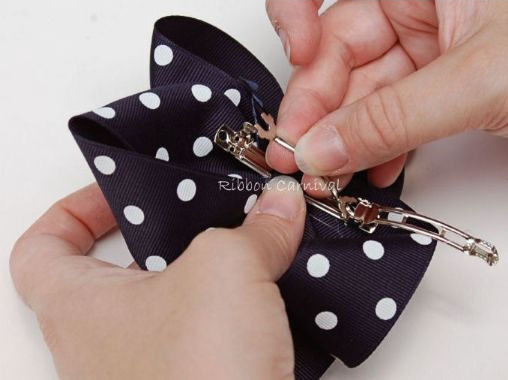
Take your 3/8 inch ribbon and glue the end piece to the back of the clip. Then wrap it
around the hair bow and glue the piece again to the back of clip.
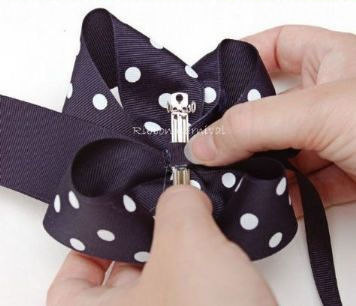
Place back the clip's spring.
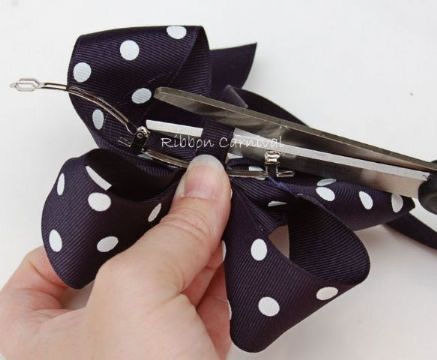
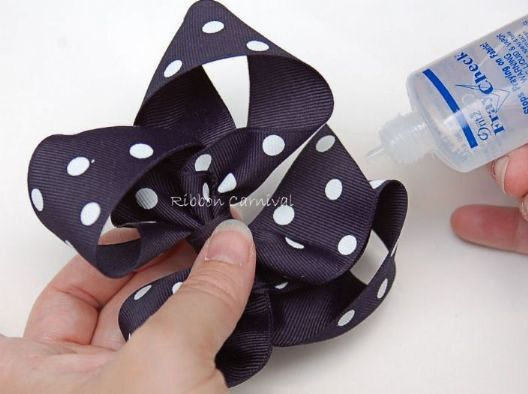
Finishing Your Bow
Take your scissors and cut your excess ribbon that will show in the front of your
bow. I personally cut it on an angle.

Seal that last piece of ribbon.
This is what is should look like when your done.
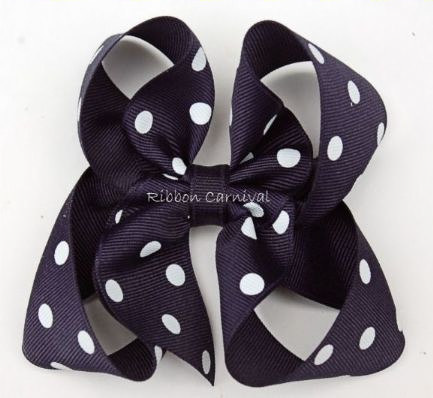
You did it!!!! You have made a beautiful reverse boutique basic hair bow.
Just keep practicing and it will get easier and easier.
I hope that these instructions have been helpful, and they have helped to
jumpstart your creativity.
You can find
5 yard increments of cheap grosgrain ribbon at The Ribbon Carnival
Ribbon at 20 or 100 yard increments of grosgrain ribbon in bulk at Wholesale Ribbon Carnival